IPMI IPKVM guide
This guide provides comprehensive instructions for accessing your server's IPMI interface, launching the IPKVM console for remote server management, and mounting ISO images, including external ISOs via our Samba/HTTP share.
Table of Contents
- Accessing the IPMI Interface
- Launching the IPKVM Console
- Mounting ISO Images
- Troubleshooting and additional notes
Accessing the IPMI Interface
-
Open the IPMI Web Panel:
Enter the IPMI web panel URL in your browser's address bar.This URL is provided in your YAML configuration under
System -> Remote Access -> Additional Parameters -> Panel -> URL. -
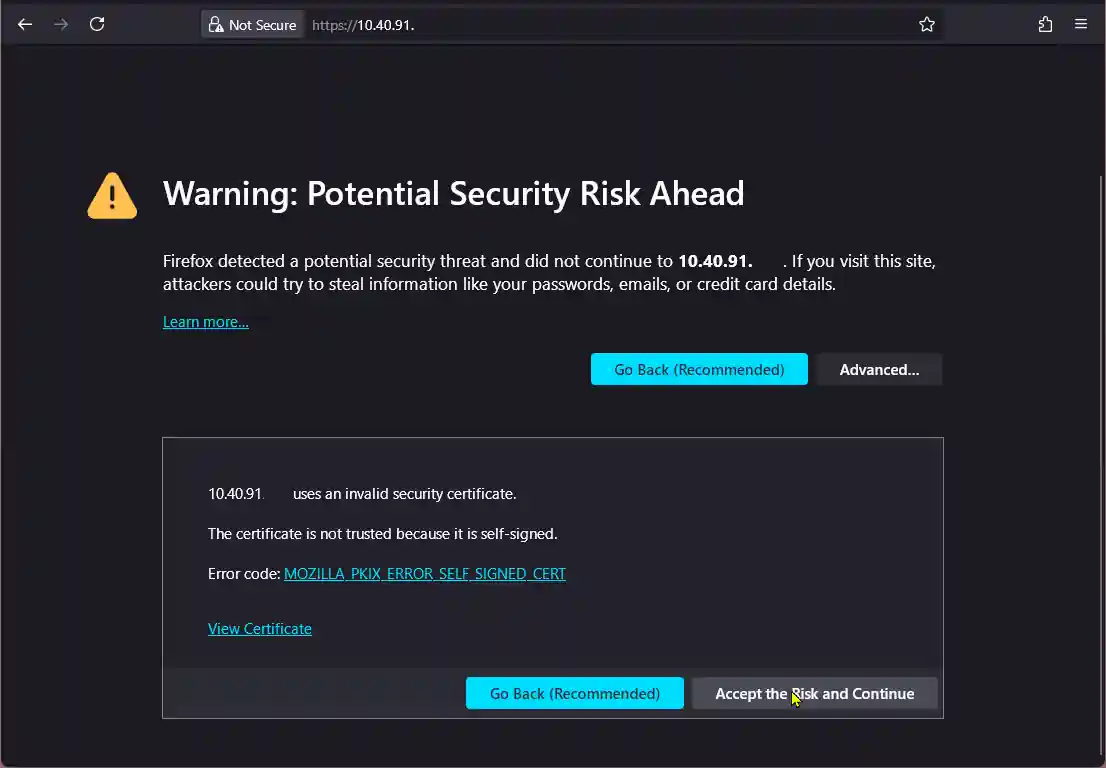
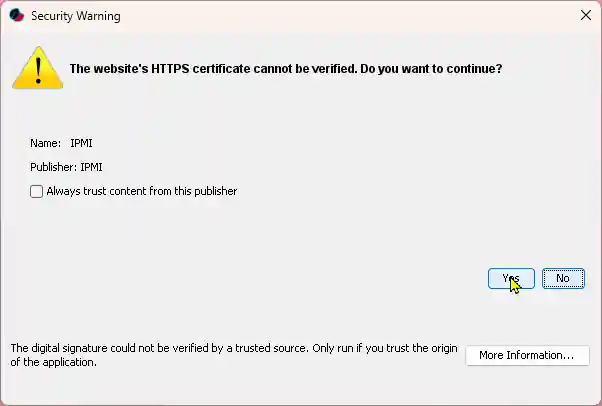
Exception acceptance
Make sure you accept the exceptions
-
Log In:
Use the username and password specified in the same YAML section to log in to the IPMI interface.For more information, refer to Guide to Interpreting the YAML Configuration and Connecting to IPKVM
Launching the IPKVM Console
Supermicro X9/X10/X11/X12 Series
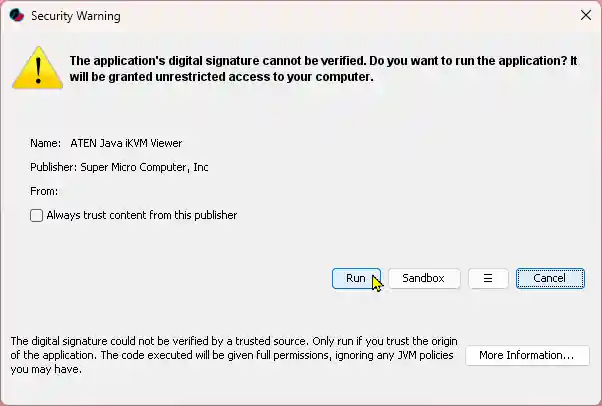
- Java Console:
- Navigate to
Remote Control>Console Redirection. - Click
Launch Console. This will download a.jnlpfile. - Open the
.jnlpfile using Java Web Start (e.g., OpenWebStart). - Accept any security prompts to run the application.
- Navigate to

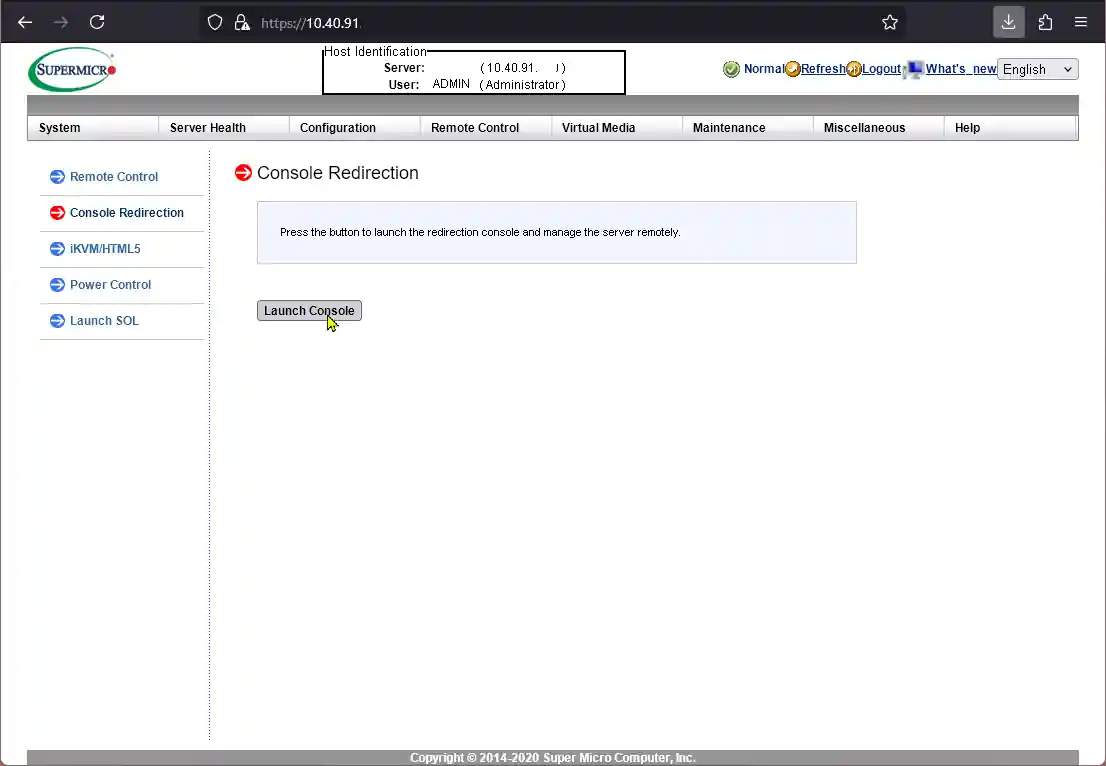
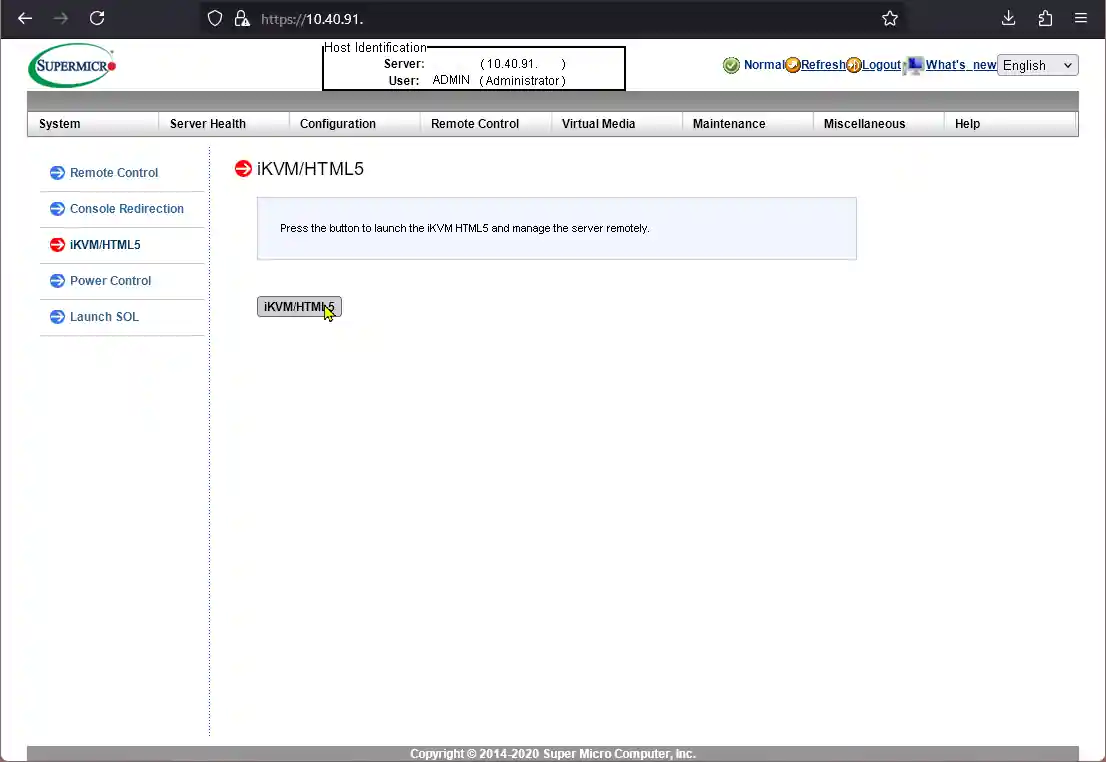
- HTML5 Console:
- Navigate to
Remote Control>iKVM/HTML5. - Click
iKVM/HTML5to open the console in your browser.
- Navigate to
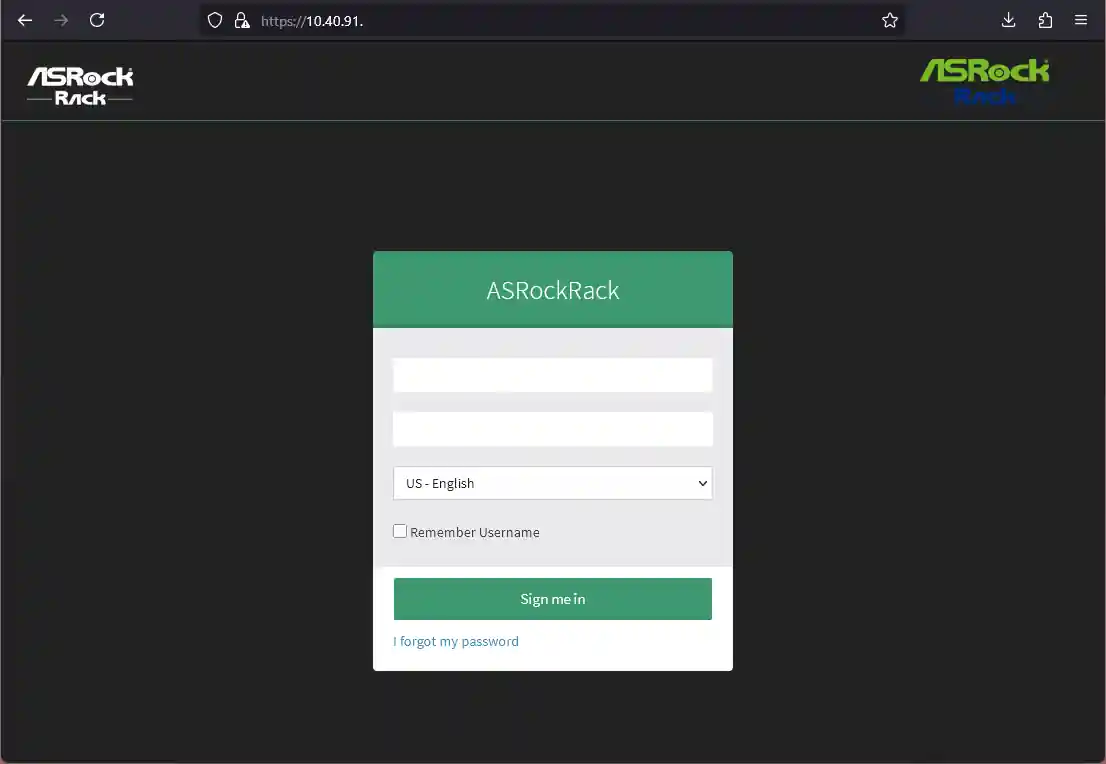
ASRockRack / ASMB9-10
- Java Console:
- Go to
Remote Control>JViewer. - Click
Java Console>Opento launch the JViewer application. - Open the
.jnlpfile using Java Web Start (e.g., OpenWebStart). - Accept any security prompts to run the application.
- Go to
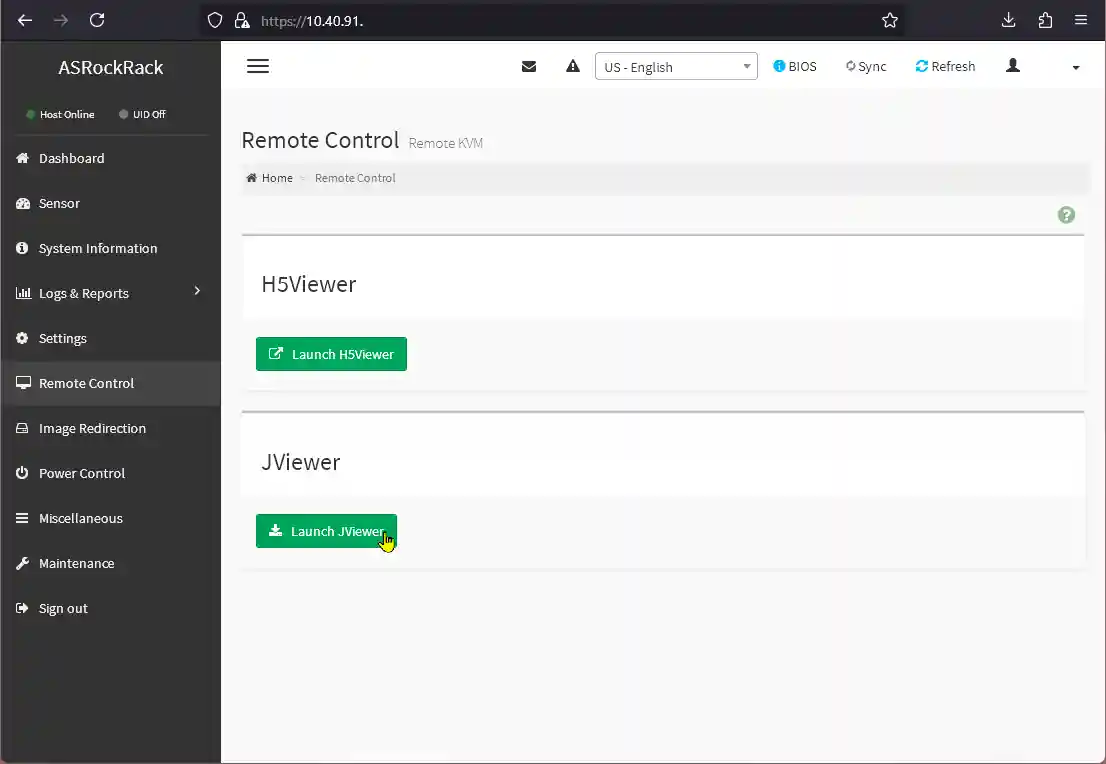
- HTML5 Console:
- Navigate to
Remote Control>H5Viewer. - Click
Launch HTML5to open the console in your browser.
- Navigate to

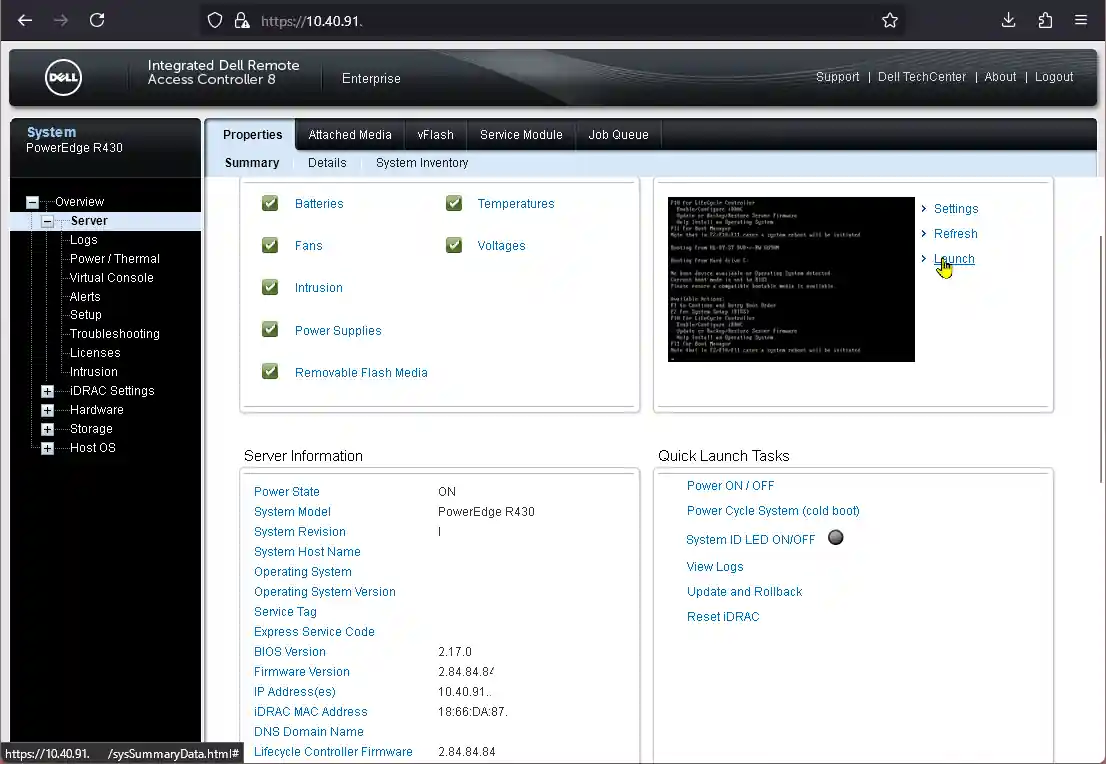
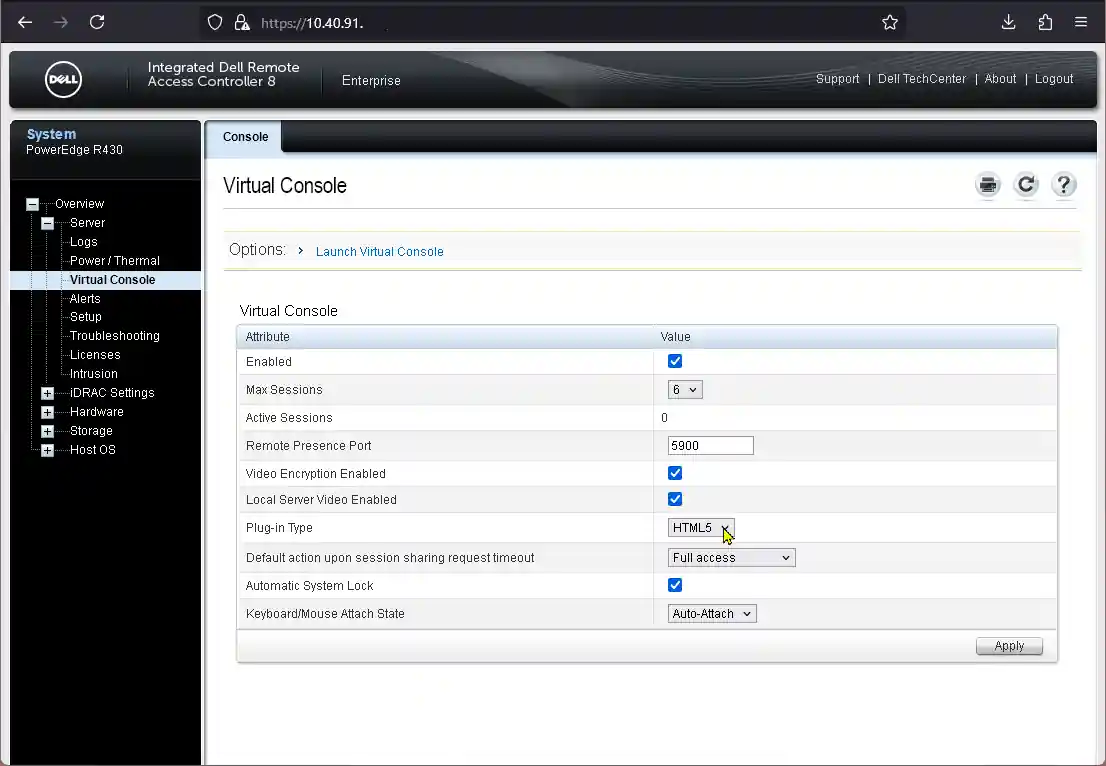
Dell iDRAC8/9/10
- Java Console:
- Press
Settingsnext Virtual Console screen displayed. - Set
Virtual Console TypetoJava. - Click
Launch Virtual Console. This will download a.jnlpfile. - Open the
.jnlpfile using Java Web Start (e.g., OpenWebStart). - Accept any security prompts to run the application.
- Press
- HTML5 Console:
- Press
Settingsnext Virtual Console screen displayed. - Set
Virtual Console TypetoHTML5. - Click
Launch Virtual Console.
- Press
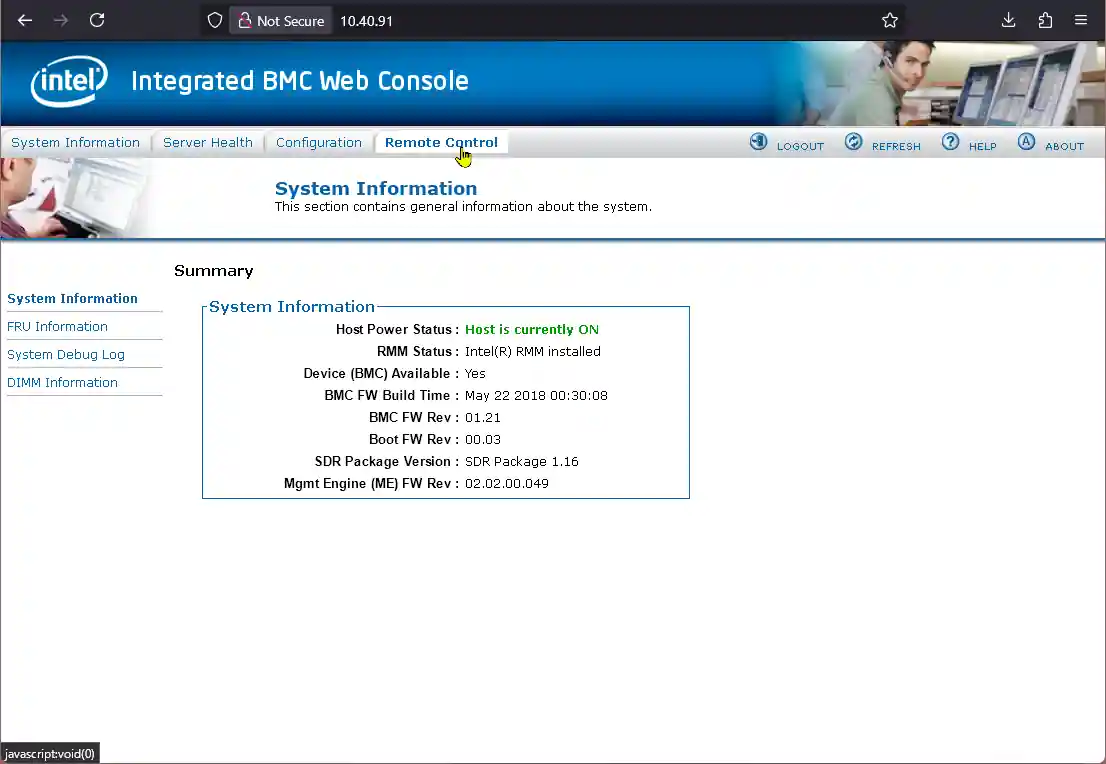
ASMB8 / Intel RMM4
- Java Console:
- Navigate to
Remote Control>Console Redirection. - Click
Launch Console. This will download a.jnlpfile. - Open the
.jnlpfile using Java Web Start (e.g., OpenWebStart). - Accept any security prompts to run the application.
- Navigate to
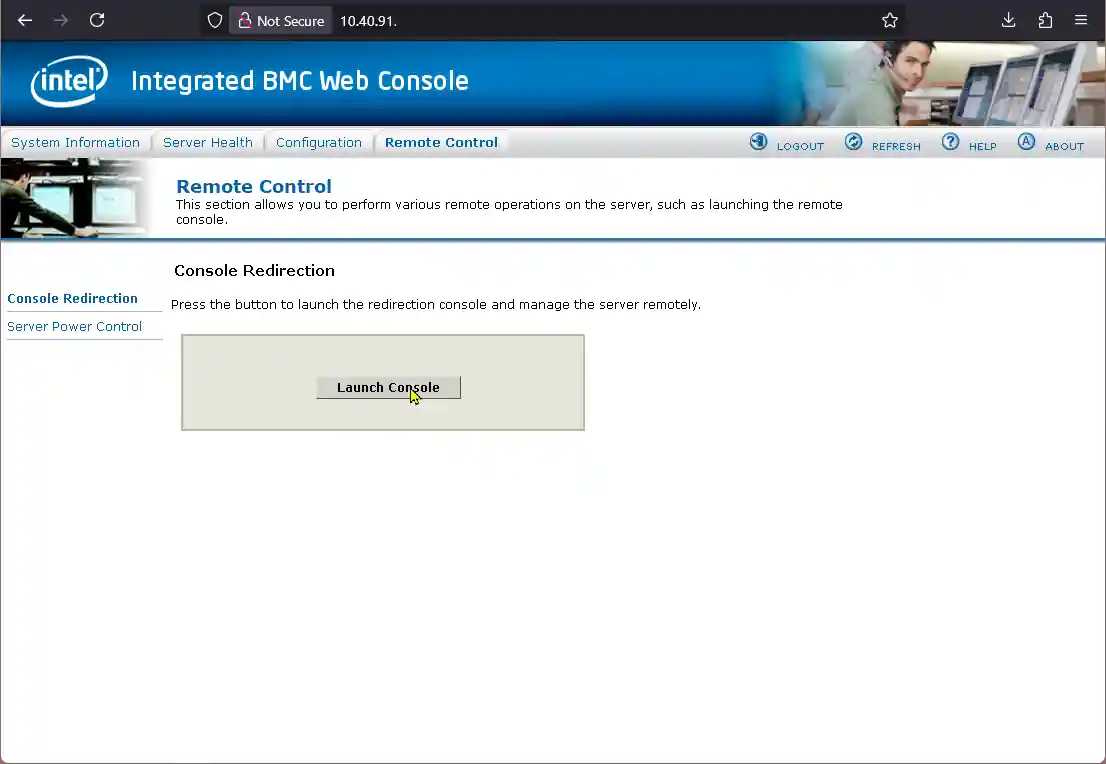
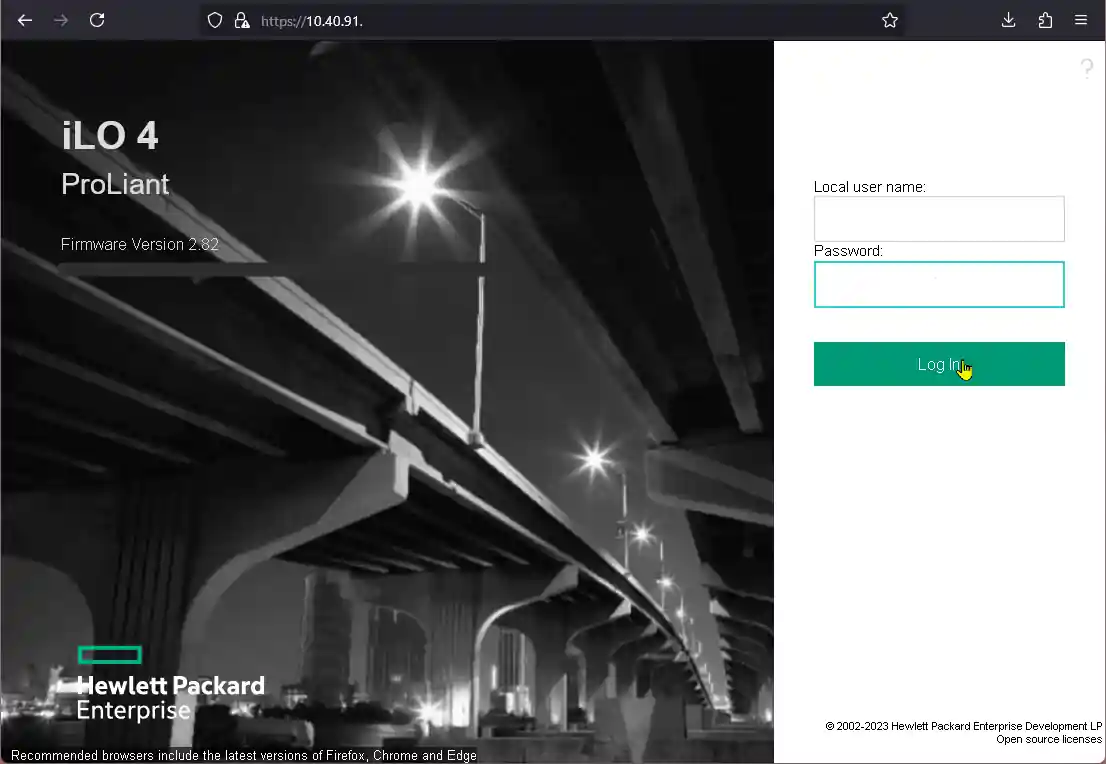
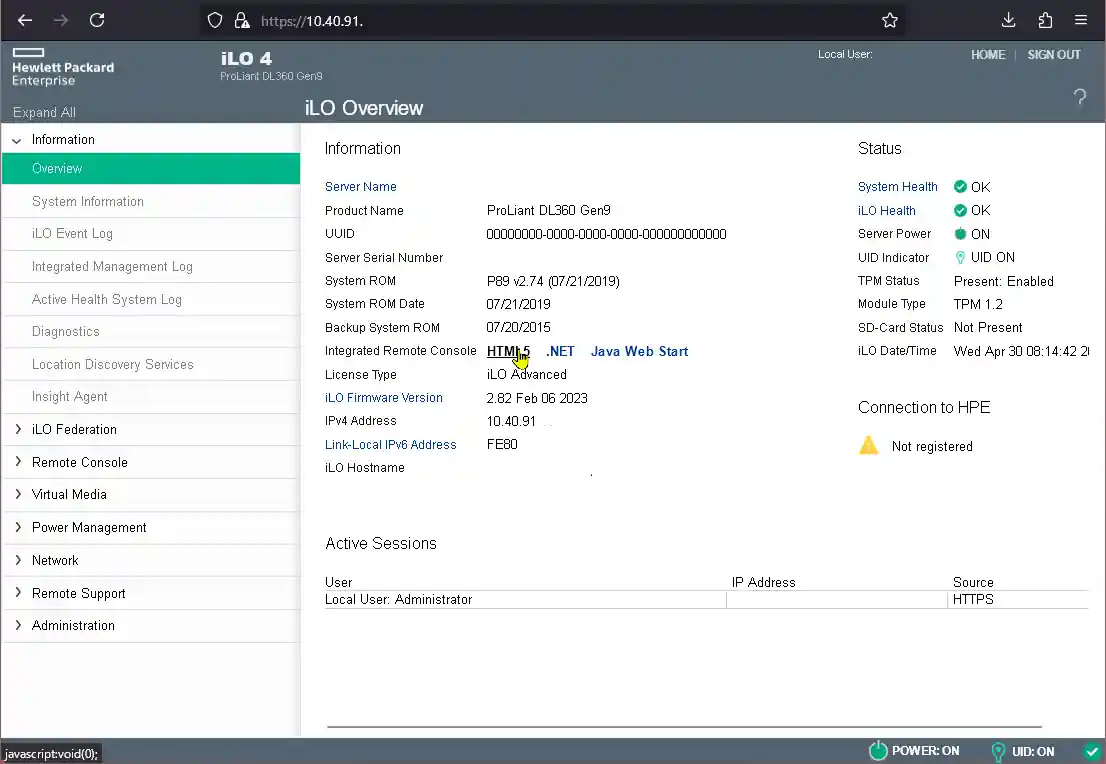
HP iLO
- Java Console:
- Find
Integrated Remote Consoleon the Overview page or use theRemote Consolesubmenu. - Click
Launchunder the Java console section. This will download a.jnlpfile. - Open the
.jnlpfile using Java Web Start (e.g., OpenWebStart). - Accept any security prompts to run the application.
- Find

- HTML5 Console:
- Find
Integrated Remote Consoleon the Overview page or use theRemote Consolesubmenu. - Click
Launchunder the HTML5 console section.
- Find
Mounting ISO Images
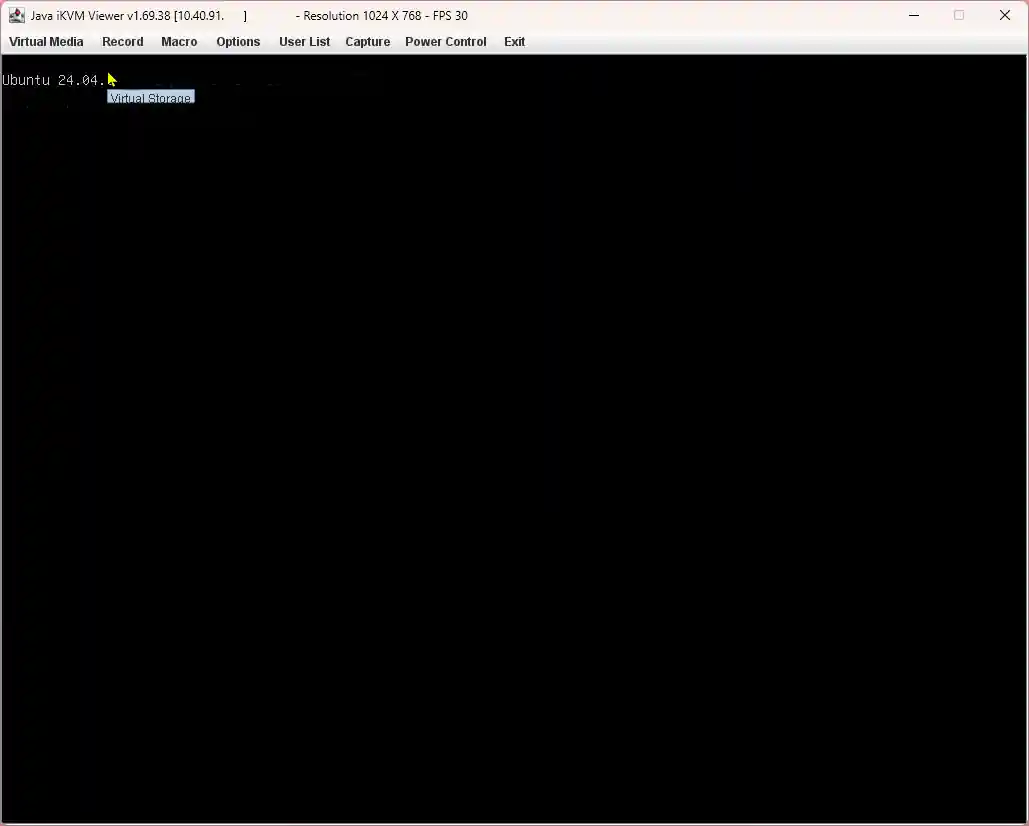
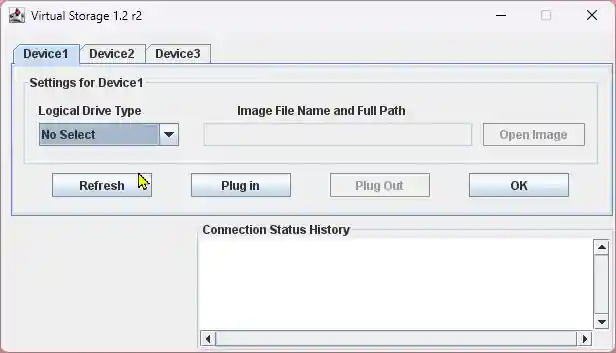
Mounting Local ISO via Console (few examples)
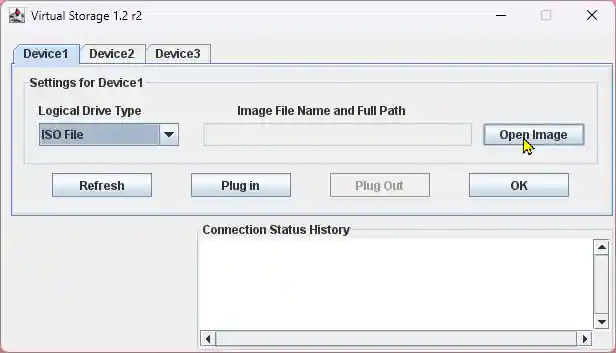
- SuperMicro Java
- In the IPKVM interface menu, navigate to
Virtual Media>Virtual Storage. - Select emulation
Device 1or any other andLogical Drive TypeasISO File. - Press
Open Imageto browse to a local file to be emulated and transferred to the server.
- In the IPKVM interface menu, navigate to
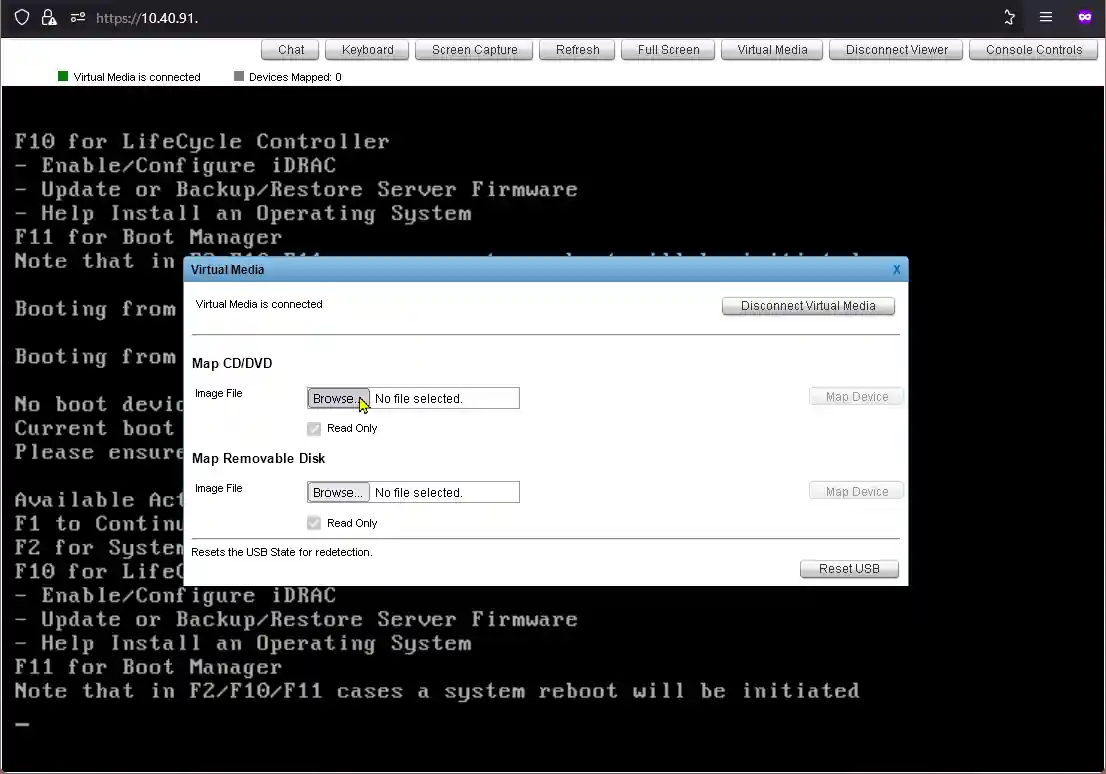
- Dell HTML5 Console
- In the IPKVM interface menu, click
Connect Virtual Media. - In the opened form, click
Browseto browse for local ISO file to be mapped remotely and pressMap Device.
- In the IPKVM interface menu, click
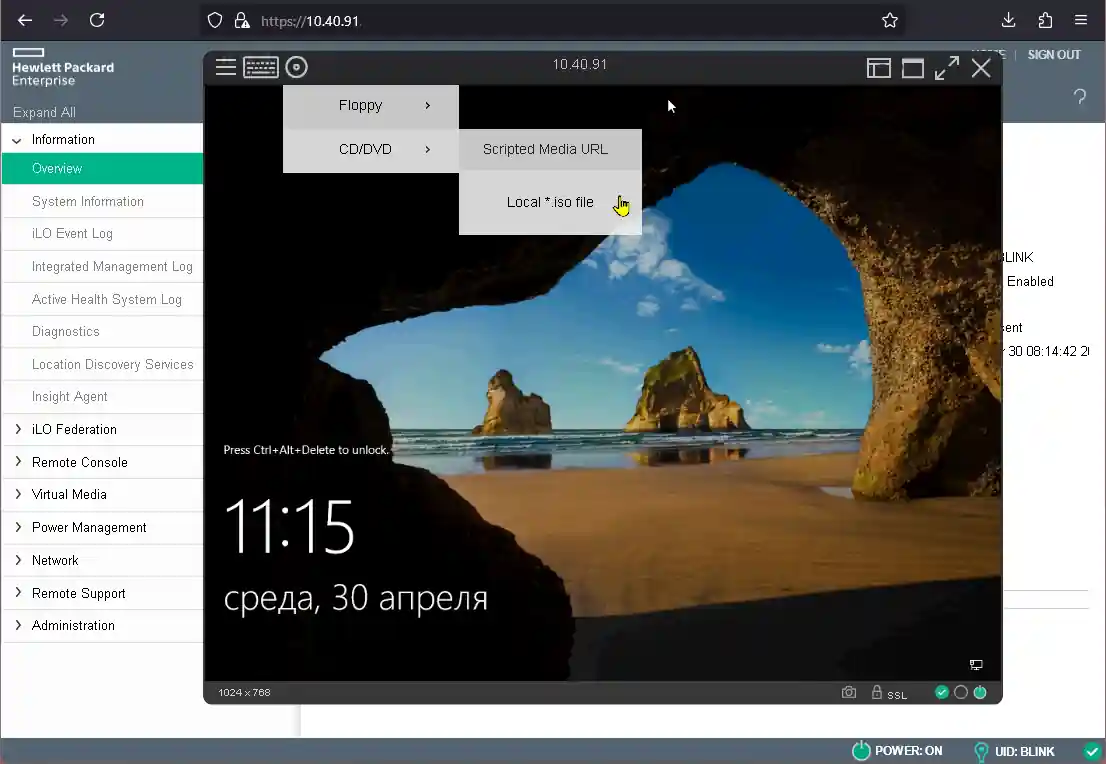
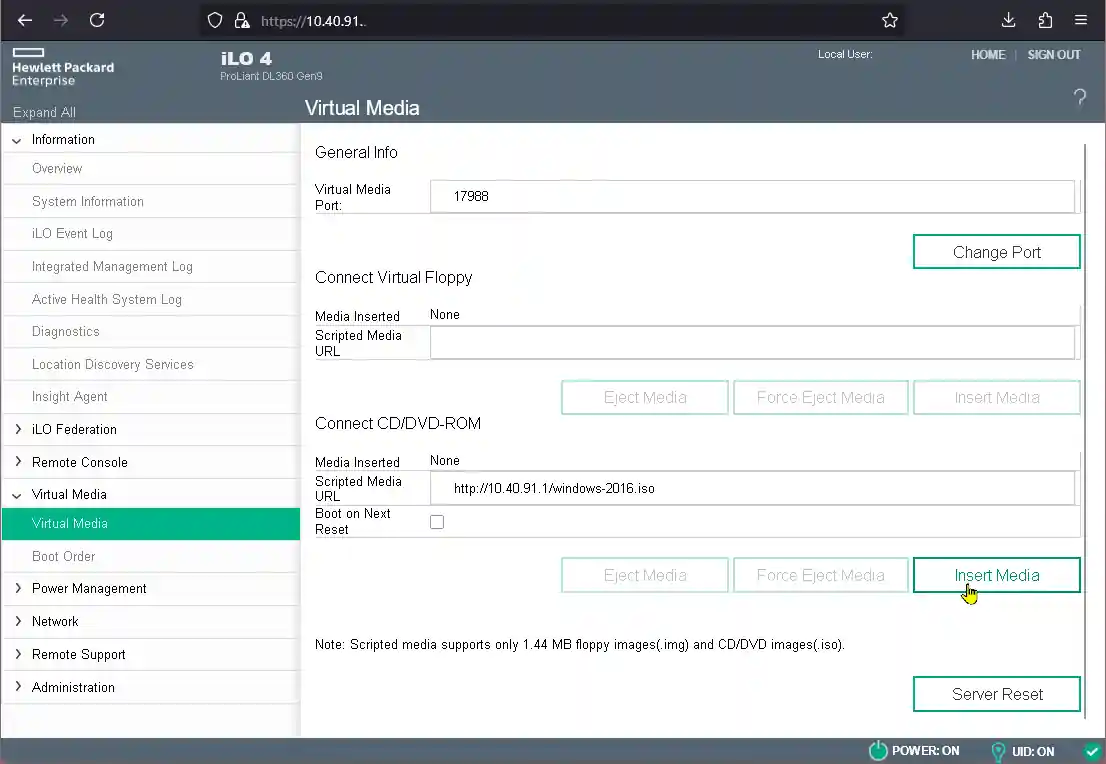
- HP iLO HTML5 Console
- In the IPKVM interface, click the CD Icon.
- In the opened selection menu, click
CD/DVDandLocal *.iso fileto browse to an ISO to be mapped remotely.
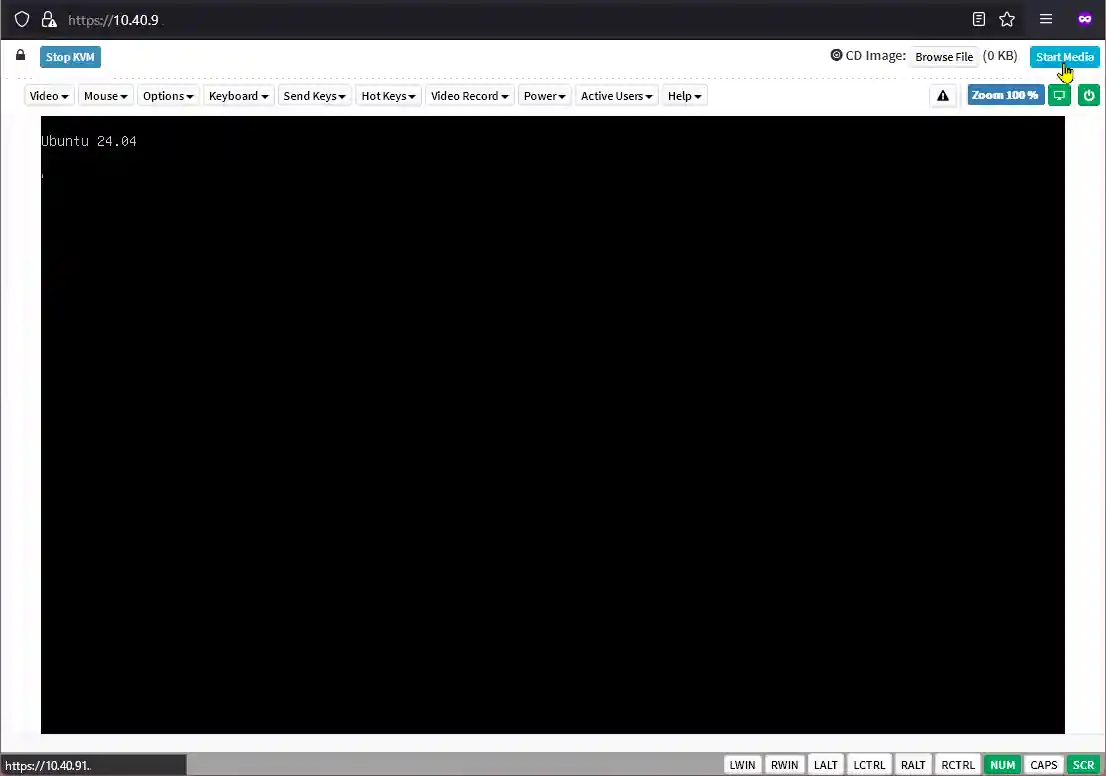
- ASROCKRACK
- In the IPKVM interface top right corner, click
Browse Fileto select an ISO to map remotely. - Right next to it press
Start Mediato start redirection.
- In the IPKVM interface top right corner, click

Mounting External ISO via Samba Share or http (few examples)
Visit https://isobucket.serverastra.com/ for a list of available ISOs and their names.
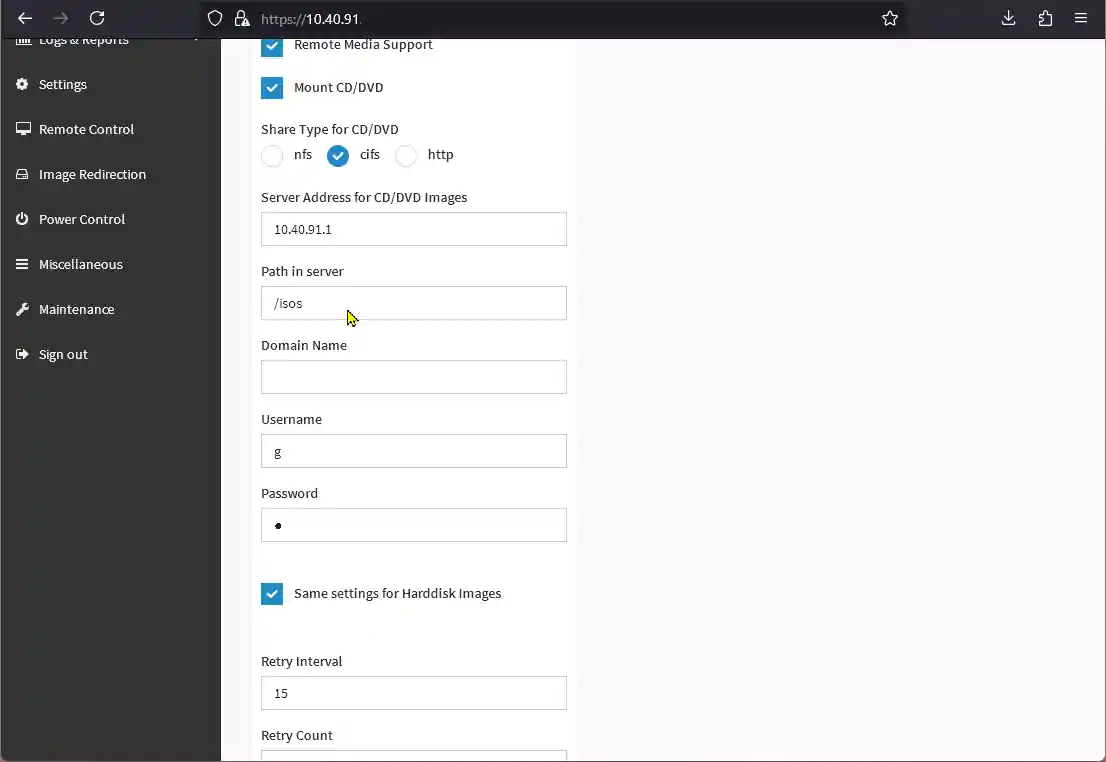
Samba/CIFS Share Settings:
- Share Host:
10.40.91.1 - File Location:
/isos/NAME_OF_ISO - User: Provide "guest" if required, do not enter if optional.
- Password: Provide "guest" if required, do not enter if optional.
HTTP Share Settings:
- Share Host:
http://10.40.91.1 - File Location:
/NAME_OF_ISO
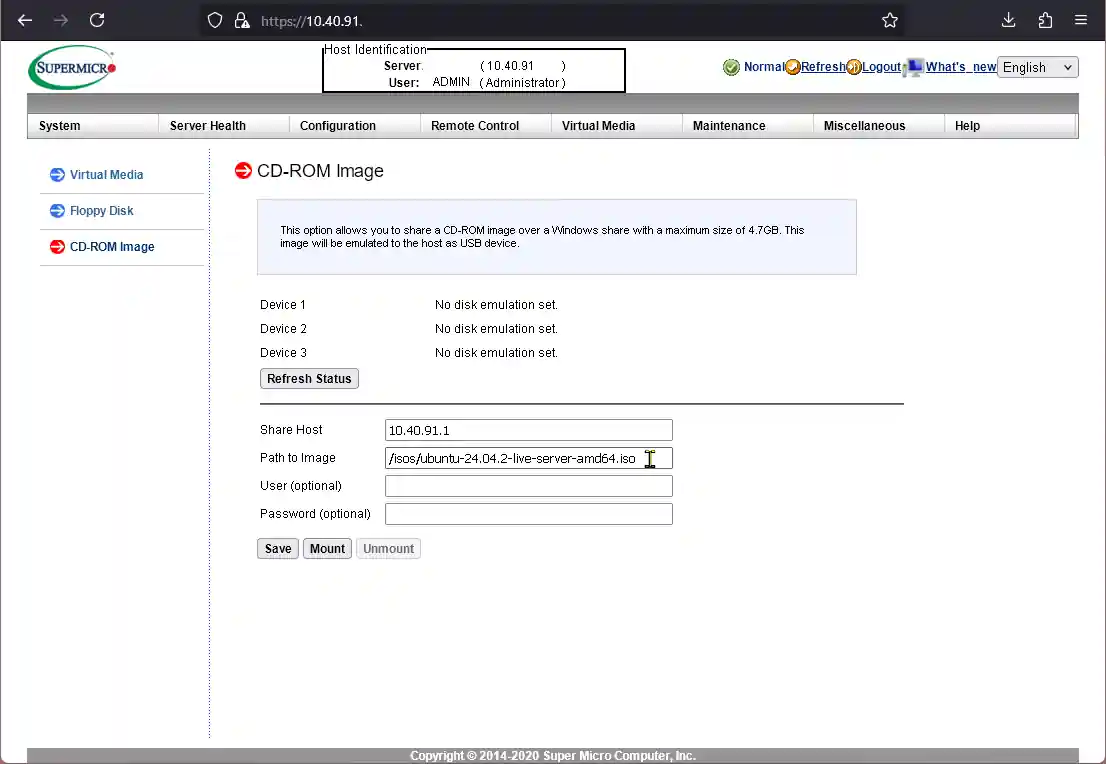
- SuperMicro
- In the IPMI menu navigate to
Virtual Media>CD-ROM Image. - Enter provided above Samba
Share HostandPath To Image. - Press
Saveto save information and pressMountto mount the ISO.
- In the IPMI menu navigate to
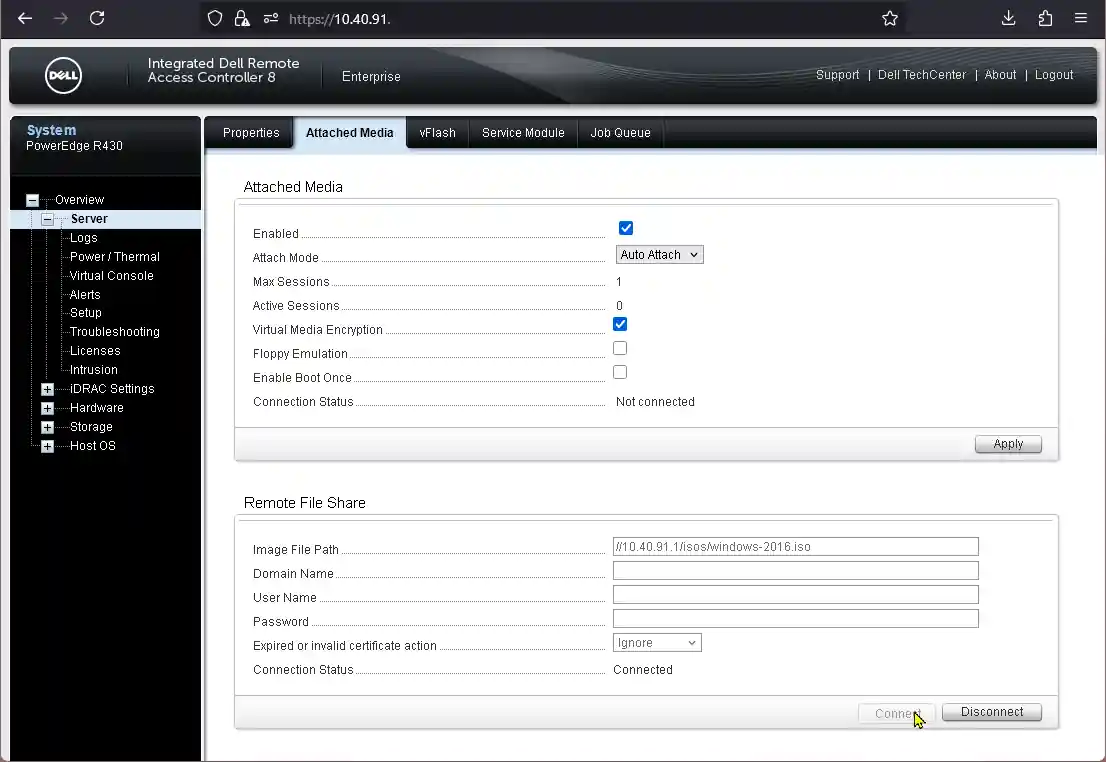
- Dell HTML5 Console
- In the IPMI menu tab, click
Attached Media. - In the opened form, enter the image file_path with Samba Share data from above.
You can enter only formatted as
//SHARE_HOST/isos/NAME_OF_ISO - Press
Connect.
- In the IPMI menu tab, click
- HP iLO HTML5 Console
- In the IPMI left side menu select
Virtual Media>Virtual Media. - In the opened form, in
Connect CD/DVD-ROMenterScripted Media URLwith data from HTTP share above. You can enter only using the format ofhttp://SHARE_HOST/NAME_OF_ISO
- In the IPMI left side menu select
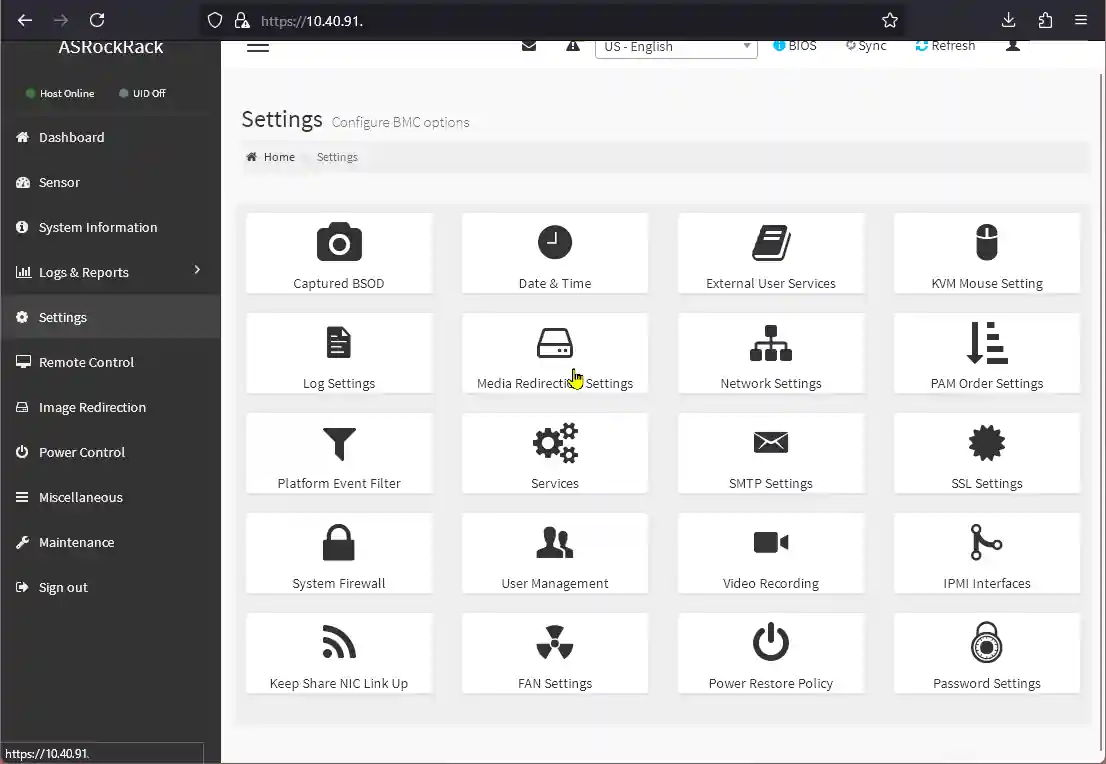
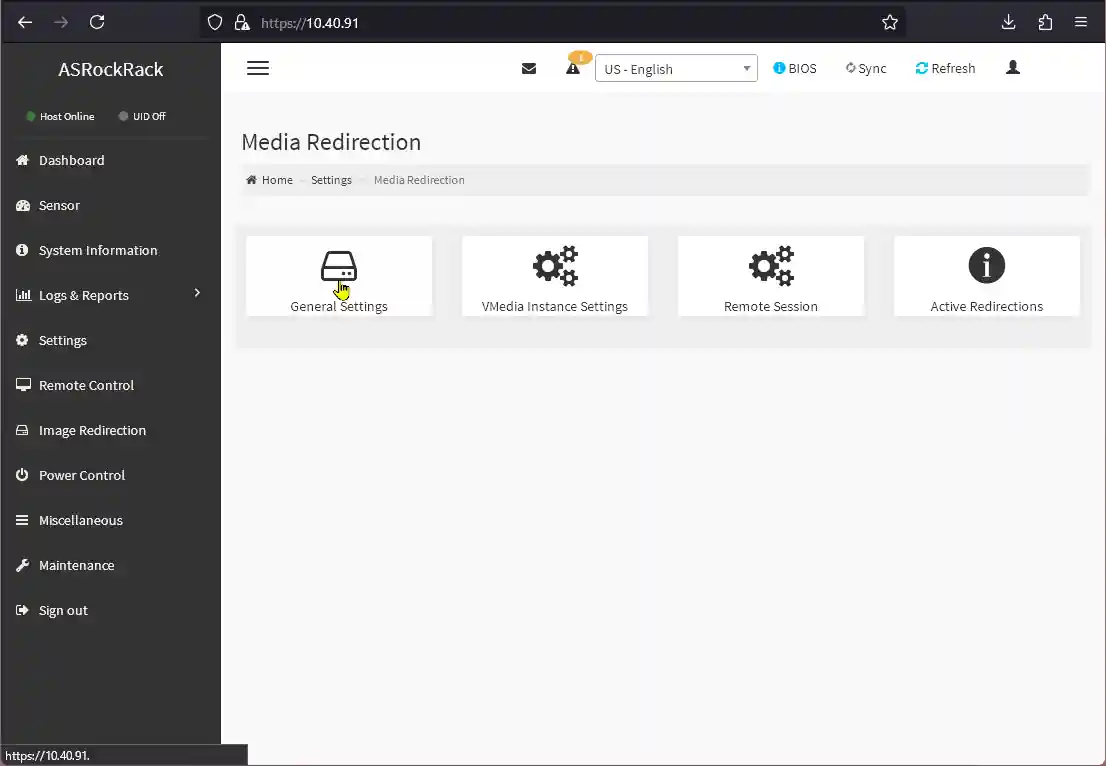
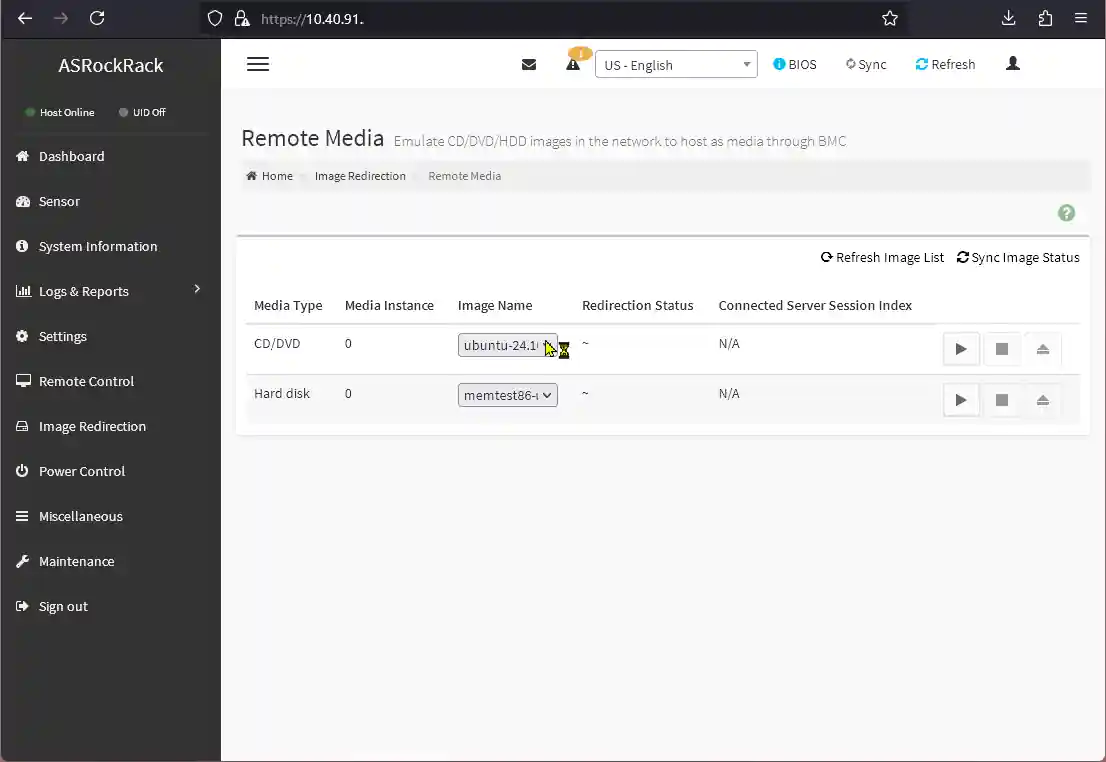
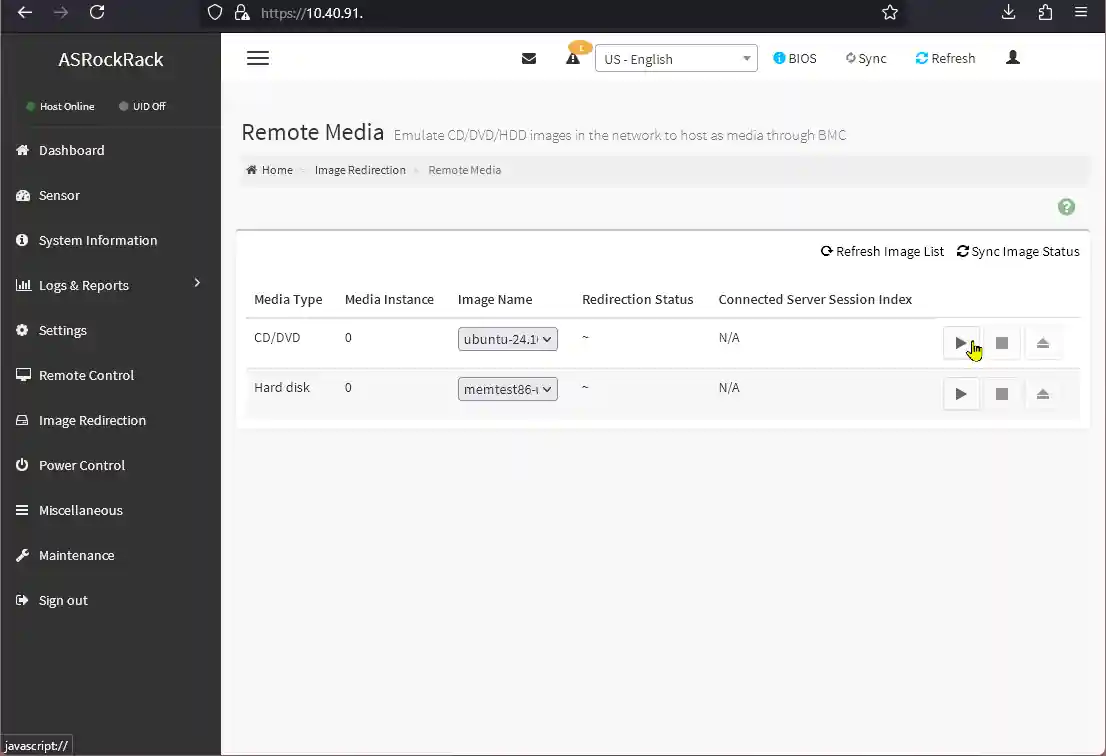
- ASROCKRACK
- In the IPMI interface left side menu, select
Settings. - In the opened dashboard, click
Media Redirection Settings. - In the following dashboard, click
General Settings. - Check
Remote Media Support,Mount CD/DVD,cifs. Enter data according to Samba/CIFS share host listed above.path in servermust point to folder not ISO! You can optionally checkSame settings for harddisk Imagesto run the IMG files from our repository. - Save the settings by clicking
Saveand pressingOkto apply changes and disconnect other sessions. - Select
Image Redirectionin the left side menu of IPMI Panel. - Await the list to load with Image names and select the ISO you'd like to run in
Image Nameoption next toCD/DVD. - Press the Play button
▶
- In the IPMI interface left side menu, select
Troubleshooting and additional notes
-
IPMI unresponsive
- Request assistance from technical support at ServerAstra.
-
IPKVM/Console keyboard unresponsive but everything else works
- Try powering off and starting again the system, in rare cases IPMI controls timeout in the system and reconnecting them via opening Console doesn't activate them as they were timed out.
ServerAstra ISO doesn't connect
- Please check that all the share host data is entered correctly. Make sure the share is of correct type. Make sure the ISO is actually redirected/mounted/connected instead of just saved or loaded.
IPKVM/Local ISO doesn't work
-
All IPKVM, including HTML5 ones REQUIRE a lot of various ports open and redirected on your system.
Port(s) Protocol Purpose Platforms 80, 443 TCP Web Interface (HTTP/HTTPS) All 623 UDP IPMI over LAN (RMCP/RMCP+) All 5900 TCP KVM Console Redirection All 5901 TCP VNC (if enabled) Dell iDRAC 5902 TCP Secure KVM Console (Intel RMM) Intel RMM 5120, 5124 TCP CD Redirection (Standard/Secure) Intel RMM, ASRock BMC 5123, 5127 TCP Floppy Disk Redirection (Standard/Secure) Intel RMM, ASRock BMC 7578, 7582 TCP KVM Console (Standard/Secure) ASRock BMC 17988-17991 TCP KVM and Virtual Media (Standard/Secure) HPE iLO Make sure your local system firewall allows full access to these.
-
Java Web Start:
- If you don't have Java Web Start installed, you can download OpenWebStart from https://openwebstart.com/download/. However in some cases you might need Java 6 (Intel RMM) or Java 7 (ASMB8) though these systems are deprecated.
-
Browser Compatibility:
- Modern browsers have dropped support for NPAPI plugins required for Java applets. It's recommended to use the HTML5 console when available and avoid using Java consoles.